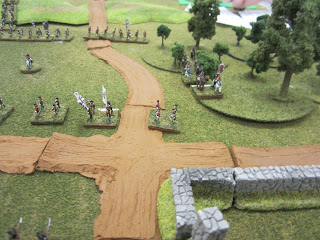
Our local convention, Enfilade, was this weekend and I ran my American Revolution battle during the first period on Friday the 27th. Like my earlier play test post about this battle we used Eric Burgess' rules "Guns of Liberty" which you can find more about here: GOL. This set of rules is fast becoming my go to set of AWI rules. They play cleanly and within a turn or two the players are managing the game themselves. I highly recommend them to anyone who has an interest in this period. I had 4 players for my game which worked out very well.
The figures are all 10mm on 1" square bases and the table size is 8' x 4'. The scenario came from the book "An Army of Professionals 2nd edition" by Robert Haworth published by Stenhouse Game Productions. This is great book with 8 scenarios with maps and army lists. I recommend this product as well.
Now on with the AAR for this battle.
The general pre-game setup. The British are on the far hill with the Patriots on the near hill with the woods and meeting house as their flanks. The game length is only 9 turns with each turn equaling 15 minutes of "real time". The scenario starts at 4pm. Turns 8 and 9 are twilight and dusk.
On turn 1 the British had the restriction of only being able to move their cavalry and their light troops due to the 11 hour force march they had conducted that day. This is turn 2 with the rest of the British streaming off the hill and advancing to wipe the Patriots off the hill and hit Washington in the flank.
More British with the cavalry moving through the light woods in the hopes of going around the meeting house and flanking the Continentals.
The view of the oncoming British over the should of the Patriot commander Stirling. The Patriot cannons drew first blood while the Continental commanders performed a delaying retreat.
As the British pushed forward the Continentals fell back forcing the British to chase them and never being able to bring their full weight of fire or melee advantage to use.
One of the Hessian units present at the battle continues to pursue the falling back Patriots.
The British light cavalry pushes through the light woods.
The British line advances hoping to catch the Continentals and let them feel their cold steel.
The meeting house in the back ground would see some bloody action soon.
The continentals using the meeting house to secure their flank as they wait and allowing the British to close and then falling back.
The lone battery inflicted causalities on the British enough to slow down some units as they regrouped and rallied.
The battle is coming to a head with the Continentals trading shots and using the stone walls to their advantage.
The Continental left falling back over the hill using the heavy woods to prevent the British from turning their flank.
General Greene arrives a little too late to do much with this battle.
The British light infantry opens fire on the retreating Patriots.
Causalities start to mount for the Patriots but they are able to hold their morale together for another turn.
The 3rd Monmouth held their ground under withering British gun fire providing time for their friends to retreat.
The British march into the Continental musket fire and pay a heavy price.
Trading shots with the British, the Patriots inflict some damage.
The British crest the hill, firing at the retreating Patriots. Stand losses on the Patriots started to mount by turn 7 but it would be too little too late.
More British reinforcements arrive having to force march their way to the battle.
The British make contact! The British seething with blood lust crash into the Continental line.
More contact made. The battle of the stone wall would be bloody.
The Patriots hold their ground and force the British to fall back from their failed melee.
The battle for the meeting house was bloody as the Patriots held their own forcing the British back with heavy losses.
The Continental left didn't fair as well as the right. They took heavy losses and fell back in disorder or routed away.
The collapse of the Continental left gave the British hope but it was too late to win the day!
The above series of pictures shows the final positions at 6pm the final game turn with the British unable to break through the Continental line and sweep up Washington's flank at Brandywine!
The victorious Continental commanders! Their choice to fall back and put space between them and the British gave them the victory. Instead of standing their ground and fighting the battle out right they helped save Washington's army.
The British commanders exhausted from their force march and ensuing battle fell back for the night to rest and then retreat back to Philadelphia.
Overall I was very pleased with the game. Everyone enjoyed themselves and the players all enjoyed the rules. It's time to paint more figures for this time period so I can put on larger battles!!!


Good read Victor!
ReplyDeleteGreat pictures Victor! I hope the ones I took of this game turned out half as good.
ReplyDeleteCan't wait to see what you took.
DeleteI played one of the British commanders, and I had a very good time. The terrain and figures were really nice and it was a good scenario. I also like GoL a lot and I don't get to play it often.
ReplyDelete- Ix
Nicely done all around!
ReplyDelete